Tahini hot chocolate

Cacao and tahini are both nutrient-packed ingredients that supply a whole host of otherwise hard-to-find minerals, such as magnesium and zinc.
I actually discovered this recipe at a cafe in Stockholm.
It was one of those “what in the name of hippies are we drinking now” moments but curiosity got the better of me so I ordered one.
It turned out to be a tasty drink whereby tahini added a nutty, creamy profile while the cacao gave it a rich chocolatey note. In summary, it is way more delicious than it sounds.

A word of advice: the quality of the ingredients you use will change this recipe quite considerably.
Basically, don’t be put off by getting this wrong in the first instance. If it’s not quite to your liking, then change the quantities of the ingredients. There is more on this below.

An even bigger word of advice: this is not a nighttime drink. Cacao is a stimulant, so it is much better to consume it in the morning or daytime.
Interestingly, some promising new research suggests cacao in the morning may help to reset our circadian rhythm.
Not that I needed an excuse for a morning hot chocolate, but in case you do then here it is.

Hot chocolate with a spoon of cacao and a small bowl of tahini displayed.

Notes on ingredients:

Milk - the milk you use will change the drink. Oat milk is generally sweeter, dairy milk can add creaminess if it’s full fat and almond milk is more likely to be bitter.
Depending on your choice of milk, you may need to add more sweetness (dairy or soy) or less cacao (almond milk).
Cacao - cacao is the raw, higher-quality version of cocoa. It is unsweetened and generally quite bitter but it does contain more nutrients. It’s usually found in the health food or baking section of supermarkets.
My two favourite brands are Naturya and Aduna.
If your drink is not chocolatey enough, then you will need to add more cacao. To do this, mix 1/2 a teaspoon of cacao with one to two teaspoons of milk to form a paste and stir this in. If you try adding more cacao powder it’ll be clumpy and just float to the top.
Tahini - this is a sesame seed paste. You will find this near the spices or in the world food section of supermarkets. Alternatively, there are much nice quality versions in Middle Eastern stores.
The whiter the tahini, the milder flavour. The darker ones tend to be more bitter.
Sweetness - Unless I have really great quality honey then I generally opt for agave for sweetness because it is much sweeter, meaning I can use less. Maple syrup is another great option, however, it is much milder so you may need to add more to achieve the desired sweetness.
Xylitol is a good sugar-free sweetener option, just make sure it is fully dissolved.
Stevia drops work to a variable degree. Personally I find the taste of stevia a bit challenging.
Other ingredients - if you are into it, this recipe works well with a little bit of maca powder, a pinch of cinnamon, or 1/4 of a teaspoon of a mushroom powder such as reishi

Ingredients
1 mug of milk - literally pour the milk in a mug of your choice. Mine was approximately 250ml
2 teaspoons of cacao
2 teaspoons of tahini, reduce to 1 if you are using a non-white tahini
1-2 teaspoons of agave, honey or maple syrup

Method
Pour the milk into a pan and heat on a medium heat.
Put your cacao, tahini and agave in the mug and mix well. It will start forming a paste. This is a good way to avoid lumps of cacao.
Take a tablespoon of the warming milk and mix that into the cacao paste. It will loosen the paste and make sure everything mixes well when you pour the milk in.
Once the milk is fully warmed up, pour it into the mug.
Stir well to mix.
Taste it and adjust the flavour if required. (i.e. add more sweetness or more cacao if it needs a more chocolatey kick.)

Antioxidant turmeric and ginger shots

Whenever I feel below par, these antioxidant shots are the first thing I reach for.
Over the years, many of my nutrition clients also benefitted from (maybe “suffered” if we consider the flavour) these golden turmeric and ginger antioxidant boosters, all with a good outcome.

Here is the lowdown on antioxidants:
We have a steady supply of antioxidants inside every cell of the body.
These antioxidants are there to counteract anything that may be looking to damage our cells. This is fairly normal by the way, even the act of making energy from sugar creates unwanted “attackers” that are quickly neutralised by antioxidants.
Sometimes, however, our supply of antioxidants runs low, leaving us feeling below par.
The vast majority of our antioxidants come from food, especially from fruits and vegetables but every now and then a shortcut or additional top up doesn’t go amiss.
That’s where these turmeric and ginger antioxidant shots come in handy.

The intel on the turmeric and ginger shots:
Turmeric and ginger both contain a heap of potent antioxidants.
Sadly, they are pretty hard for us to absorb by themselves, especially curcumin, the active ingredient in turmeric.
The good news is, I appraised the scientific evidence (read I did some epic nerding) to ensure the antioxidants present are as absorbable as possible.
There were two key findings:

1. The active ingredients in turmeric are fat soluble, hence the base of coconut milk.

2. Turmeric benefits from a little bit of extra help to be absorbed.
For this reason, you may have heard of the combination of turmeric and black pepper in supplements.
I’m not a fan of that combination. A little bit more on that here.
Luckily, quercetin, an antioxidant found in citrus zest is a great alternative that can similarly improve the absorption of turmeric. In addition, citrus zest contributes even more antioxidants in the form of citrus polyphenols. Just make sure that lemon is 100% organic and unwaxed, for obvious reasons.

Onto the recipe.
The ingredients are listed below but here are a few notes and storage options:

Turmeric root - larger supermarkets, especially Sainsbury’s and Waitrose tend to stock the root itself. It’s generally hidden next to ginger or fresh herbs.
Alternatively, check your local Middle Eastern or Asian store or order it online.
The recipe can still be made with turmeric powder, but it’s better with fresh root turmeric.
Turmeric powder tends to lose its antioxidant content over time. This is worth considering if you’ve left that jar of turmeric powder in your spice cupboard for years.
All in all, fresh turmeric root has a bit more going for it and has a milder (nicer) taste.

Ginger root - it’s pretty standard stuff. You get awarded extra points if you manage to get hold of organic ginger root because organic ingredients tend to have more antioxidants.

Coconut milk - this one is a biggie. Most tinned coconut milk contains a long list of unnecessary ingredients that extend to emulsifiers, thickeners and gums. Needless to say, these are not ideal but the good news is pure coconut and water-only coconut milks do exist.
Aim for one that does only contain coconut and water.
Clearspring and Biona are both brilliant options.

Lemon zest - as I mentioned before, please use organic, unwaxed lemon. Lemons, and other citrus fruit, for that matter, are usually coated with both synthetic wax and a couple of different antifungal agents. The latter are known carcinogens.

Storage:
Owing to how messy making these antioxidant shots is, my recommendation would be to make a larger batch and freeze it.
I tend to freeze them in a silicone ice cube tray and pop a couple of ice cubes every now and then.
Occasionally, I’ll defrost them by adding a little bit of hot water to the ice cubes.

Ingredients

1 tin of good-quality coconut milk
1/2 a teaspoon of cinnamon 
A large chunk of ginger 
4 bits of turmeric root 
Zest of 1/2 an organic, unwaxed lemon 

Method
Peel the ginger and turmeric root.
Please use gloves to peel turmeric because it will dye your hands otherwise.
Put everything into a blender and blend for a couple of minutes until smooth.
If the coconut milk you are using is particularly thick then add a splash of water for ease. It’ll help everything blend better.
The liquid will keep in the fridge for 3 days.
Freeze in ice cube trays for longer-term storage.

The viral egg wrap

Most social media recipes should be approached with a healthy dose of scepticism.
Many look super shiny but lack any actual flavour.
So in an ode to weed out the good from the bad, I started giving a few of them a go for research purposes.
There are ones that are an instant nope. I’m particularly thinking of kale salads and “healthy” bowls with zero seasoning when I say this.
I’m all for healthy food but unless it has good flavour it’s unlikely to become a staple source of nourishment.
Anyway, I found a pretty cool viral recipe.
It’s this egg wrap.
Basically an omelette that you slap a wrap onto, let it go crispy then stuff it with veggies.
It ticks the nutrition boxes and makes an awesome breakfast or lunch.

Whilst we are on the topic of wraps, please read the ingredients list.
Many are full of emulsifiers and various additives to keep them being the soft, bendy wraps that we are used to. Sadly these are the very same ingredients that are wreaking out gut health.
They are really hard to digest and cause bloating in most people.
The wraps I used here are by Crosta & Mollica. They don’t use random, chemical ingredients, just natural, real whole foods.
In case you are looking in supermarkets, the Crosta & Mollica wraps are called piadina.
It’s well worth looking for them. They are super tasty and develop a satisfying crispy exterior when toasted.

Ingredients for 1 wrap:

2 eggs
1 wrap
Oil for cooking (I used organic rapeseed oil)
Salt and pepper to season
Feta cheese
Salad veggies for stuffing inside the wrap. Anything goes. I used lambs lettuce, cherry tomatoes and rocket.
Hot sauce. The extra flavour is needed.

Method:
1. Break open the eggs and put them in a bowl. Give them a whisk to mix.
2. Put a frying pan on a medium heat. Ideally, the frying pan should be small/ big enough to fit the wrap snugly.
3. Add a splash of oil to the pan and pour the eggs into it. Let this cook until the edges start to set.
4. Put the wrap on top of the omelette and flip it over.
5. Let the wrap cook for a couple of minutes until it goes crispy.
6. Remove the eggy wrap from the pan and pop it on a plate. Season it will sea salt and black pepper.
7. Stuff the wrap with feta and whatever veggies you chose.
8. Drizzle some hot sauce on it, if it’s your thing.
9. Fold the wrap over. Proceed to stuff it in your face. Enjoy!

Transylvanian pea and spinach stew

Certain dishes evoke a great deal of nostalgia.
It’s a little trip back to your childhood, a holiday, your nan’s kitchen etc etc.
This recipe is a fully nostalgic one for me, taking me straight to my childhood home of Transylvania.
At the time of growing up, imported food was still exceptionally rare. (Post-communism had its merits, albeit none that I truly appreciated at the time.)
The lack of imported food meant we had to entirely rely on seasonal produce, preserve foods when there was a glut and make the best of every morsel of every foodstuff.
It’s a hipster dream now but back then it was, an often difficult, reality.

I always looked forward to spring.
Preserves (think A LOT of sauerkraut & similar items) were replaced by fresh, vibrant greens. Blossoms and berries added colour to the otherwise bleak landscape.
Pea season would soon be looming.
I loved fresh peas as a child.
I still do.
This recipe brings together the best of those greens that appear during spring and combines them with tasty peas.
The recipe works with any greens but spinach is perhaps the mildest. If you want to go wild with it, young nettles are a great alternative.
Give it a go.
I’m biased but it’s super tasty. (and very very frugal)


Ingredients to serve 2:

1 onion
1 clove of garlic
1 tablespoon of flour or gluten-free alternative
1 entire bag of spinach (200g approx)
1 mug of frozen peas
1 mug of milk or plant milk (it’s better with milk but you do you)
1 stock cube
A small bunch of parsley (10-15g approx)
Sea salt & black pepper to season
A drizzle of whatever oil for cooking

Toppings (entirely optional but totally recommended)
Creme fraiche - find it near double cream in supermarkets, it’s a cultured version of cream and is the traditional way to serve this dish. Almost everything has creme fraiche on it in Transylvania.
A boiled egg - for extra protein
A few extra herbs to sprinkle on top
Nuts or seeds for added crunch - I popped a few macadamias on top because I had some left over
Sliced avocado - entirely untraditional but it brings a different texture profile to the dish

Method:
Pop a saucepan on a medium heat.
Add the onion, garlic and a splash of oil.
Cook gently until the onion has softened.
Add the flour and cook for a further minute.
Time to add the spinach. You’ll likely need to do this bit by bit as the spinach wilts. Keep cramming it in there and cooking it down.
Once the spinach has wilted, pour in the milk and cook for a further minute.
Grab the parsley and pop it in a blender.
Pour the spinachey liquid over the parsley, season well with sea salt and black pepper and blend it until it’s mostly smooth (it doesn’t have to be perfect).
Return the green sauce to your saucepan.
Add the frozen peas and gently heat up it the peas are no longer frozen. Avoid boiling it too heavily because that’ll turn the vibrant green colours brown. It’s better to gently heat it and allow it to slowly bubble.
Check the seasoning and season again if it needs a bit more salt and pepper.
Top with any/ all of your chosen toppings.
Serve immediately.
The full video instructions are available here: Recipe video

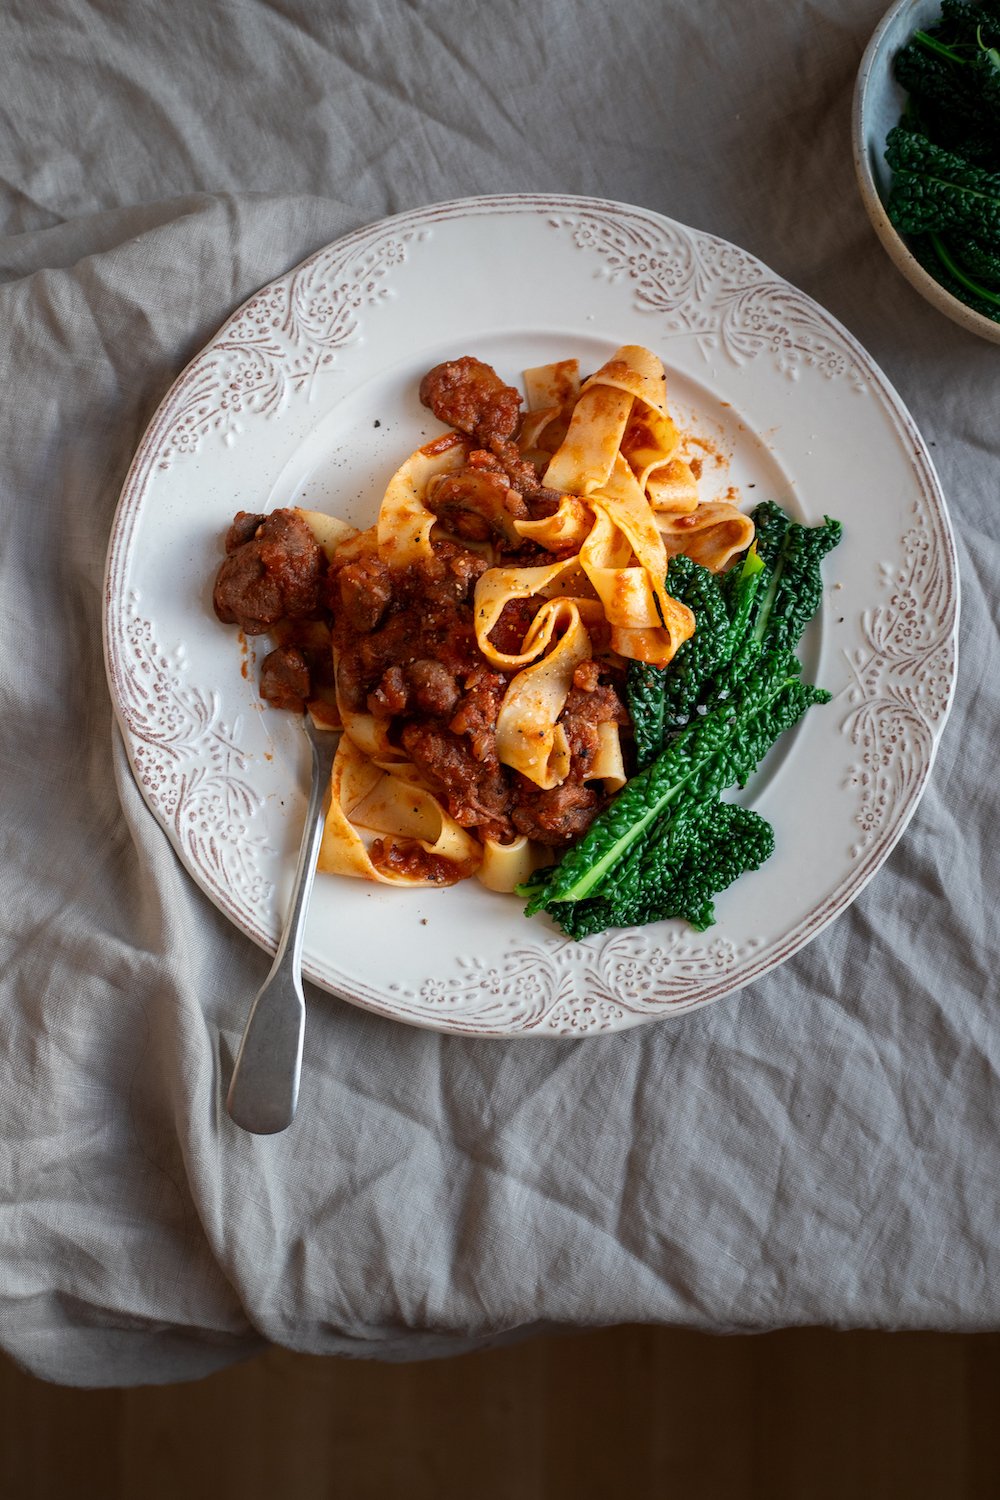
Venison & red wine ragu

There are so many reasons to cook more wild venison.

First, it’s hugely nutritious, boasting higher protein levels than other red meat sources and more of the hard-to-find minerals zinc and selenium.
It is also very lean, meaning we don’t need to worry about saturated fats. (FYI - I don’t worry about saturated fats.)

Second, it is actually sustainable.
Yes, sustainable red meat exists. Venison is perhaps on top of that list.
The thing with deer in the UK is they don’t have a natural predator. Thanks to this, coupled with an abundant supply of food and the introduction of non-native deer species, we have somehow ended up with a few too many of them on our shores.
Sadly, they love to munch on trees which is damaging woodlands and all the lovely woodland-dwelling species that live in those environments.
In a nutshell, too many deer means fewer trees, which is bad news, so we cull deer each year.
Cue a supply of sustainable, highly nutritious protein.

Last but not least, venison is delicious.
I may be biased but this recipe is super tasty.
Think a rich ragu with chunks of meat that cooks in 30 minutes flat.
In fact, you don’t need to cook venison all that long full stop, thanks to its low fat content.

Top tip: check the recipe notes after the methods section if you aren’t familiar with “chefy” terms.

Ingredients to feed 2

300g of diced wild venison (it’s in many supermarkets now)
1 onion, finely diced
1 stick of celery, finely diced
5-6 chestnut mushrooms, roughly sliced
2 cloves of garlic, crushed or finely diced
1 large carrot, blended into a puree (blending the carrot makes a sweeter, thicker sauce)
1 bay leaf
300ml passata
1 glass of good quality red wine. I used an organic Italian Primitivo.
Sea salt and black pepper for seasoning
Any good quality oil for cooking, I used cold-pressed rapeseed oil

Pasta & greens to serve.
I used pappardelle pasta and kale.

Method

1. Add a couple of tablespoon of oil to a large saucepan on a medium-low heat.
2. Pop in your onions & celery immediately and allow them to saute until they are soft. Approximately 10 minutes.
3. Turn the heat up to high.
4. Add the venison and cook for a couple of minutes until it is beginning to colour. You’ll need to give the pan a good stir to stop anything from catching.
5. Pour in the wine and let it cook until almost all of it is gone. It’ll bubble away quickly.
6. Stir in the mushrooms and garlic.
7. Turn the heat down to low, add the carrot puree, bay leaf and passata and season it well with sea salt and black pepper.
8. Let everything bubble away slowly on a low heat for 20 to 30 minutes until the sauce has reduced and the meat is tender. If the sauce is looking too dry then add a splash of water.
9. Taste the sauce and add more salt & pepper if needed.
10. Serve with pasta and a side of greens.

Recipe Notes

Finely diced onion & celery = the smallest squares you can humanly chop onions & celery into.

Passata is a “sieved” version of chopped tomatoes. Think smoother chopped tomatoes. Available from most supermarkets and usually lives next to chopped tomatoes.

If you need to feed more than 2 people, simply multiply the quantity of ingredients.

Pureeing a raw carrot adds natural sweetness to your ragu. If you can’t be bothered to wash a blender (or don’t have one) then dice the carrot and add it to your pan at the same time as the onions/ celery.